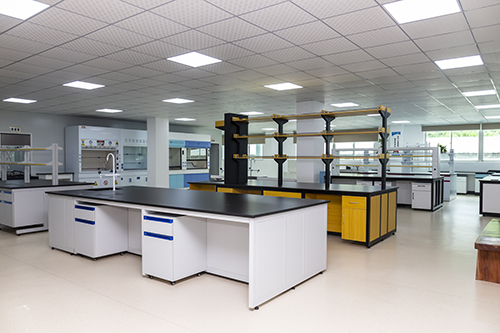
Search
Close this search box.

How To Install The Lab Workbench?

Install lab workbench
This article will help step by step to install the lab workbench. It can help you avoid some mistakes and provide some valuable details.

Share This Post

 The structure of a chemical laboratory workbench is divided into three types: all-steel structure lab workbench, steel-wood structure lab workbench, and all-wood structure lab workbench. For the chemical lab workbenches of the above three structures, the following installation steps and requirements are as follows:

Installation Steps of The All-Steel Lab Workbench


Step 1: Check the height of the adjustment feet at the bottom of the cabinet, and rotate all the adjustment feet to a distance of 5mm from the ground so that the ground can be adjusted unevenly.


Step 2: Put various cabinets in place according to the drawings, and observe whether the top table is high or low. If it is not flat, adjust the feet of the cabinet and measure with a spirit level to make the horizontal and vertical levels horizontal, and connect the edges of the cabinet with screws or capped bolts. When connecting, pay attention to the flatness of the surface, whether there are bumps or not. Each adjustment foot must be on the ground and can withstand gravity.


Step 3: After fixing the side sealing plate, you can enter the countertop installation. If sink and reagent rack column holes are on the countertop, open them before sticking to the countertop.
The installation of the countertop can be divided into two methods:


1. The glue valve;   2. the screw fixing method.

(1)Apply silica gel evenly on the bonding surface of the connected cabinet body. The surrounding silica gel is 10mm-15mm away from the edge of the cabinet body to prevent the glue from overflowing after pressing the top.

(2)After the glue finishes, place the countertop flat on the cabinet. When laying flat, please put it in place as much as possible without any dislocation in case the glue overflows and falls on the cabinet when moving, which is not easy to clean and affects the bonding effect.


(3)The line transitions to the tabletop, which is flat. If the table top is uneven, two treatment methods can be used: pad leveling and heavy pressure. That is, the place is raised with rugged materials, and the high position is pressed down with heavy objects, depending on the situation. There is also a method of adjusting with screws. Drill holes on the folded edge of the cabinet, and then adjust the height of the tabletop with the length of the screws. If you use 4mm screws, the hole diameter should be 3.2mm.


(4)After the glue is dry, press the object on the front table, and then do the processing of the tabletop. If the corners of the countertop are rounded, there should be no gap between them countertop; if the corners of the countertop are made at right angles, leave a gap of ≤3mm for filling, please refer to the content in (2).
The steps are as follows:

①Affix the textured paper to the joints of the two countertops;

②Apply silicone or epoxy glue with the same color as the countertops. If there is a 3mm gap on the countertops, the glue must be filled to prevent the joints from cracking, and The glue peels off;

③After 20 minutes, use a metal sheet or a scraper to scrape the adhesive on the platform surface, quickly tear off the masking paper, and clean the surface;

④A circle of white silica gel is applied to the bonding place between the countertop and the cabinet. Pay attention to protecting the table during operation; there may be scratches, missing corners, and other phenomena. Precautions: 1) Do not put sharp metals, tools, and the same substance on the table; 2) During construction, do not tear off the protective film of the table; 3) Do not wear shoes on the table without protection Operation, to pave the way.

 Installation of All-wood Lab Workbench


Step 1:
Put the cabinets required for each room in the place. Turn the cabinet down, draw a line on the bottom plate to adjust the position of the feet, screw on the adjustment feet, and screw them to a certain height (the skirting board is 100 mm, for example, the adjustment feet are screwed to 105mm).


Step 2: According to the installation drawings, the cabinets required for each set of central tables or side tables should be laid out first and then connected. Next, use a 4mm drill to drill holes in the side plate connection. Generally, four holes are drilled, the surfaces of the two cabinets are aligned and connected with screws, and then the side sealing plate is installed to make the whole set of test bench shape and position.


Step 3: Use a spirit level to measure the cabinet level. If there is any error, adjust the adjustment feet at the bottom of the cabinet until it is level. When adjusting, you can use a long straight bar to hang flat on the top of the cabinet to see if the cabinet is on the same level. Check whether the adjustment feet are inclined, empty, or fall off when moving so as not to affect the load-bearing capacity of the cabinet.

Step 4: The door panel and drawer surface can be divided into two installation methods: submerged and outer cover types. After the door panel is installed, it needs to be adjusted, and the door seam is controlled within 2mm. To make the lines even. The embedded door panel is that the plane of the door panel is recessed 2mm from the side panel surface, and the surrounding gap and the cross gap are between 1.5mm-2mm, keeping the horizontal and vertical lines consistent, with no apparent size and the cross angle cannot be dislocated. When it does not collide with the four sides, check whether the hinge screws are loose to prevent them from falling off when opening.

Step 5: Choose skirting boards of appropriate length and arrange them on each set of test benches (do not cut the size of skirting boards quickly), connect the corners with small angles and push the bottom of the cabinet, then use 4*30 round head screws. The base plate is fixed up and down. Generally, the skirting line is indented into the cabinet by 20mm, so the skirting line and the bottom plate are close. The nut of the screw and the base plate is opened. To prevent moisture deformation and expansion.

Step 6: The installation method of the countertop is to use silica gel first and then screw it. Other procedures and requirements are the same as those of all-steel and steel-wood.

(1) Trial installation, according to the situation on-site, if there are corner posts or water pipes, etc., it must be cut according to the size;

(2) Clean up the dust, put on the tape, and put it on the countertop. If the countertop is uneven, use a stiff wire to pad the high and low places and a heavy object to compact the arched part. Just fine-tune the thickness and arching of the countertop;

(3) After the silica gel is cured, do the seam treatment, and the steps are the same as above;

(4) White silica gel is applied to the countertop, the corners of the countertop, and the cabinet.

Installation Steps of The All-Steel Lab Workbench


Step 1: Check the height of the adjustment feet at the bottom of the cabinet, and rotate all the adjustment feet to a distance of 5mm from the ground so that the ground can be adjusted unevenly.


Step 2: Put various cabinets in place according to the drawings, and observe whether the top table is high or low. If it is not flat, adjust the feet of the cabinet and measure with a spirit level to make the horizontal and vertical levels horizontal, and connect the edges of the cabinet with screws or capped bolts. When joining, pay attention to the flatness of the surface, whether there are bumps or not. Each adjustment foot must be on the ground and can withstand gravity.


Step 3: After fixing the side sealing plate, you can enter the countertop installation. If sink and reagent rack column holes are on the countertop, open them before sticking to the countertop. The structure of the countertop can be divided into two methods: one, the glue valve; two, the screw fixing method.

(1)Apply silica gel evenly on the bonding surface of the connected cabinet body. The surrounding silica gel is 10mm-15mm away from the edge of the cabinet body to prevent the glue from overflowing after pressing the top.

(2)After the glue finishes, place the countertop flat on the cabinet. When laying flat, please put it in place as much as possible without any dislocation in case the glue overflows and falls on the cabinet when moving, which is not easy to clean and affects the bonding effect.

(3)The line transitions to the tabletop, which is flat. If the table top is uneven, two treatment methods can be used: pad leveling and heavy pressure. That is, the place is raised with rugged materials, and the high position is pressed down with heavy objects, depending on the situation. There is also a method of adjusting with screws. Drill holes on the folded edge of the cabinet, and then adjust the height of the tabletop with the length of the screws. If you use 4mm screws, the hole diameter should be 3.2mm.

(4)After the glue is dry, press the object on the front table, and then do the processing of the tabletop. If the corners of the countertop are rounded, there should be no gap between the countertop; if the corners of the countertop are made at right angles, leave a gap of ≤3mm for filling. Please refer to the content in (2).
The steps are as follows:
①Affix the textured paper to the joints of the two countertops;

②Apply silicone or epoxy glue with the same color as the countertops. If there is a 3mm gap on the countertops, the glue must be filled to prevent the joints from cracking, and The glue peels off;

③After 20 minutes, use a metal sheet or a scraper to scrape the adhesive on the platform surface, quickly tear off the masking paper, and clean the surface;

④A circle of white silica gel is applied to the bonding place between the countertop and the cabinet. Pay attention to protecting the table during operation; there may be scratches, missing corners, and other situations. Precautions:
1)Do not put sharp metals, tools, and the same substance on the table; 

2) During construction, do not tear off the protective film of the table;

3) Do not wear shoes on the table without protection Operation, to pave the way.

The Installation Method of the Lab Hanging Cabinet


Step 1: Determine the height and length of the hanging cabinet on the wall, and make a mark.

Step 2: Use the ink fountain to play a straight line on the wall according to the mark.
The third step: Drill holes on the inclined hanging board of the hanging cabinet, and 4-5 pieces are the standard for the 1000mm cabinet.

Step 4: Draw the hole position on the wall with the eyed hanging strip, and set the left and right positions.

Step 5: Use an electric hammer on the wall, make a hole with a diameter of 12mm according to the hole position, and then use a 12*12 wood tip to nail it into the wall. Be careful that the wood tip does not protrude from the wall, and the hole cannot be punched at the air conditioner.

Step 6: Use 4*60 self-tapping screws to fix the diagonal hanging half to the wall, and hang the hanging cabinet.

Step 7: Use 4*30 screws to connect the hanging cabinets, pay attention to the sight line at the bottom of the hanging cabinets.

Step 8: After the door panel is installed, it will be level with the bottom plate, and then adjust the door seam to make it even.

Subscribe To Our Newsletter

Get updates From Our Prefessional Team

More To Explore

laboratory equipment
Laboratory Management

How To Manage The Laboratory Equipment

We found that more than 80% of laboratory equipment management is still dominated by manual labor. In this case, let’s take a deeper look at how to comprehensively manage laboratory equipment

Looking For a Professional Lab Furniture manufacturer?

drop us a line and keep in touch